|
|
Java Virtual Rosary...HELP! |
|
| Minimum Requirements: 1152x864 screen resolution, Java SE 6 (JRE/JDK 1.6.0)
Without these, don't bother! A port to Mac OS X will come when they
see fit to support a modern JRE on any of their pre OS X 10.5 systems.
IFF you have OS X 10.5, then you can upgrade if you haven't already. JVR will be tested on this sytem when it becomes available to the developer. Instructions for installing JDK 6 for FreeBSD can be found here for those with older versions of OS X. Installation: You will for the present need an archiving utility capable of "unzip -ping" "tarred" and bzip2'ed archives. There are plenty such applications for Windows, including the ports of GNU tar and bzip2 themselves. Those familiar with untarring tarballs can skip all this section. Newbies should read on... For "newbies," I recommend you download mu Commander, a twin panel "Norton Commander" type of application which is very like the JVR insofaras it's written in Java to be truly cross platform and is Free Software. It handles quite a few archive types, listed on the website. For unpacking JVR tarballs, it will do nicely, as can be seen below: 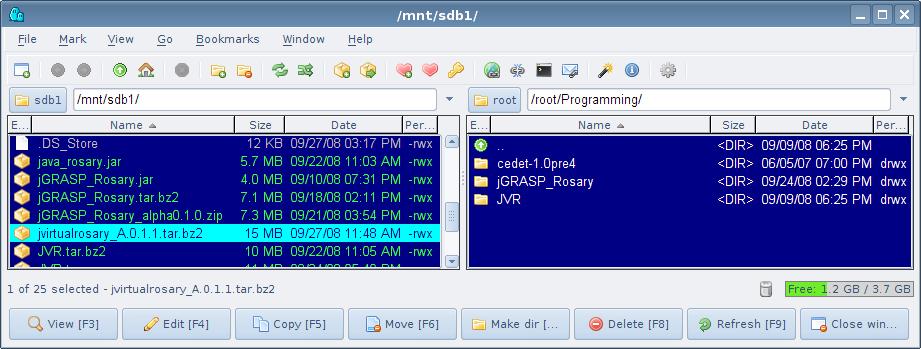 First, highlight the JVR tarball in one panel, with the
other panel pointing into the directory you plan to install
to. In this example, the install directory /root/Programming is
shown in the righthand panel, with the file jvirtualrosary_A.0.1.1.tar.bz2
highlighted on the flashdrive directory /mnt/sdb1 where it resides.
By either double-clicking the mouse or hitting <Enter>, one
can then browse the archive as is seen in the next illustration: 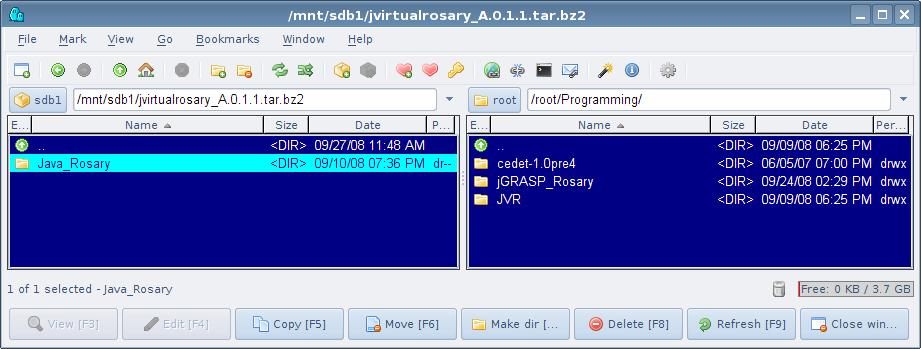 Now, the top of the JVR directory structure is highlighted. One then just can hit F5, or click on the Copy button to unpack into the directory of choice. The screencap below shows mu commander browsing the tarball in the left panel, and the newly unpacked files from it in their "install" directory, /root/Programming/ JVR/Java_Rosary/ on the right. 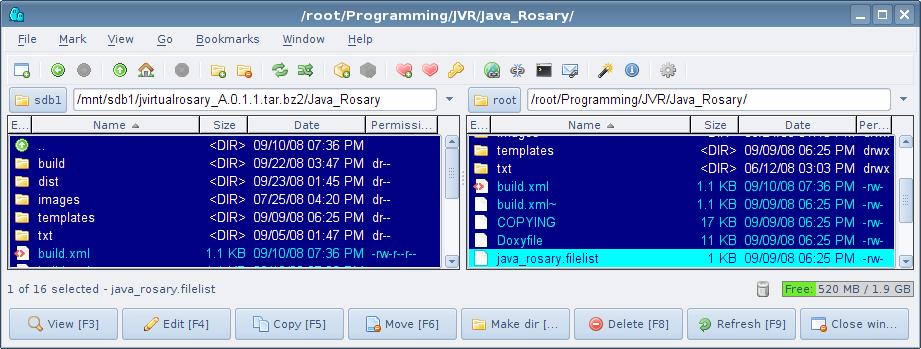 That is all there is to "installation" per se. Future releases will feature executable self-unpacking zip files for Windows, and several of the more widely used packaging schemes (rpm, *.deb, *.tgz) plus the venerable tar.bz2 source + binary format for all platforms, including a pure Java installer in time. Source and binaries might be separately packaged also. It has been assumed that the $PATH to the Java Runtime Environment (JRE) has been set on your platform. This will be of concern when it's time to run the JVR, as is detailed in the next section. To run JVR: Some JRE version 6 will be needed to run JVR. If you don't know which JRE your system has and don't know how to find out on your own, then go to Sun's JVM test page. A screen cap of the JRE under which the JVR is developed is shown below:  Sun
provides ample instruction down that very page to users unfamiliar with
procedures for installing/upgrading their JRE or JDK. As can be
seen in the screencap above, Java 6 u7 is the environment JVR is being
developed under. Anything pre-6 is not recommended and probably
won't work. IFF you have the right JRE, then open an x-term or DOS command prompt session in the JVR ./build/ directory. The screencap below of a KDE Konsole session illustrates the proper commands there. 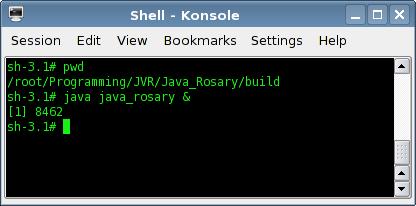 In a UNIX shell, one can ascertain the current directory with the "pwd" command, as shown above. The venerable "dir" will do for DOS shells. The JVR is started with the next command shown, "java java_rosary &" with the ampersand (&) typed at the end of the line to free the command prompt up; a procedure called "backgrounding" the process. There is no need for this in DOS. Upon hitting <Enter>, the Process ID number (PID) is shown, in this example 8462, then the system returns to the command prompt. The JVR opens in the state shown in the screencap following, which also can be seen on the Screen Shots page.  Note the text-panel immediately below the Rosary image on the lower left containing the Intro text, "God be with you! ..." As stated there, to start your Rosary after suitably configuring it from the menus above, go to the File Menu and select Start. To advance from one prayer/bead to the next, either pick the next bead, OR just click the "Amen" button, which can be detached to float above the Rosary application by pointing the mouse into the cross-hatched space on the left, then dragging the button. Using the Amen button to advance through the prayers is recommended, not to mention madatory for the End-of-Decade prayers. The purpose of making bead selection possible also with the mouse pointer is to allow users to pick a prayer if they make a mistake like clicking Amen prematurely, or if they need to start at some point which they may have left off from earlier. When you Start the actual Rosary prayer from the File menu as directed, the text in the Prayer-text-panel changes to the opening prayer of a Rosary, as specified on the Vatican website by His former Holiness, John Paul II in his ROSARIUM VIRGINIS MARIAE. After the Sign of the Cross, the Opening Prayer is shown as follows:
As can be seen, there is a plea to God to help you, followed by the Gloria. Future Features will include User's choice of which Opening Prayer to say. Click on the Amen button or the Crucifix icon directly . Observe how the Crucifix Icon now is highlighted and the Apostle's Creed now showing in the Prayer Text-panel. Click again on the Amen button when you're done and the next prayer and bead, the first Our Father, are selected. Note how the Amen button can be freed from the Rosary display-panel as shown on the Screen Shots page and in the captured image of the Prayer-text-pane below:
Meditation Text: will appear in the text-pane on the lower right corner, below the Meditation Image. When the user starts a new Decade, the corresponding Meditation Image and the title of the Mystery set will appear, followed by the Decade, then the actual Mystery itself. The Our Father appears in the Prayer-pane. Prayer, titles and Meditation image all are shown in the next screen-cap. 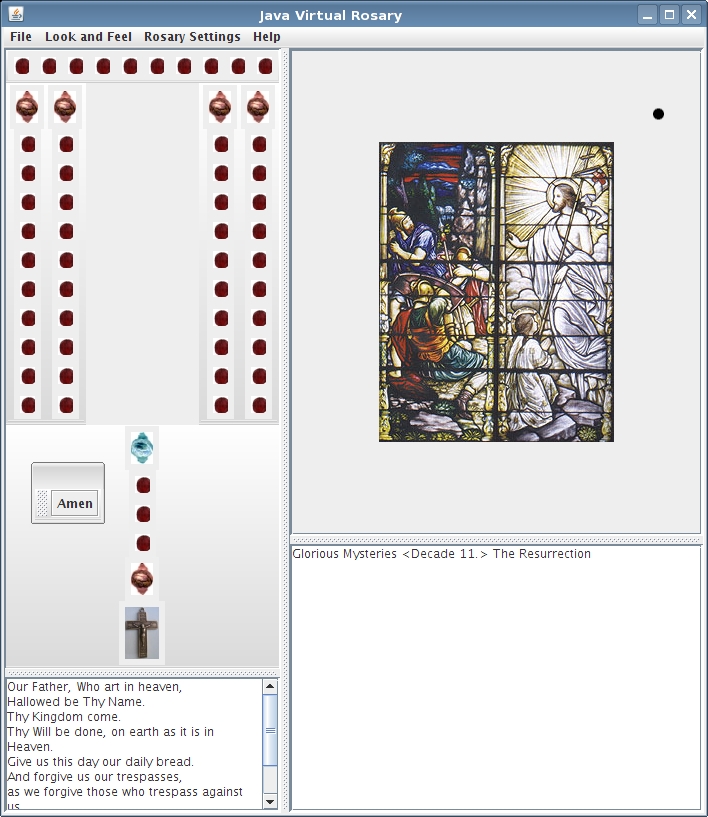 Note
how the Our Father bead is highlighted. The Mystery set title for
the given weekday shows in the Meditation pane throught the session.
Sure enough, when the user clicks on the Amen button again, then
the text of the Hail Mary appears in the Prayer-text-pane and the text
of the Scriptural meditation for that very Ave appears in the
Meditation-text-pane to the right, as is shown below:
Finishing a Rosary in JVR: is
fairly intuitive, but merits a little comment here as the End-of-Decade
prayers are then followed by the End-of-Rosary prayers. While the
latter currently are not configurable, this rigidity will be overcome
in future releases which God willing won't be long in the offing!
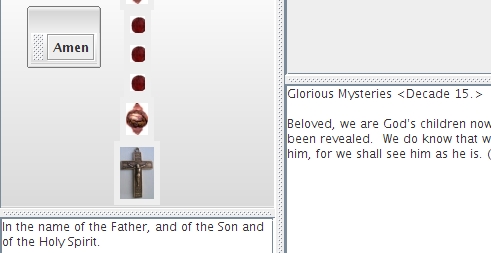
Attend to the end of the 5th Decade. Observe that the last
Ave bead is high- 
 Amen! Please return frequently to check for updates! Gerald E. P. Morris | ||||||||||||||||